

Wednesday, May 23, 2012
Sea Glass
I've just posted one of my new creations on Etsy. I've recently gotten hooked on making candy, so if you like homemade things like sponge candy and sea glass, then you might want to stop by my Etsy shop and check out my new items.
Here is a preview of what is up.
 You can find my Etsy shop here.
Friday, April 27, 2012
Daring Bakers' April Challenge: Armenian Nazook and Nutmeg Cake
The Daring Bakers’ April 2012 challenge, hosted by Jason at Daily Candor, were two Armenian standards: nazook and nutmeg cake.
Nazook is a layered yeasted dough pastry with a sweet filling, and nutmeg cake is a fragrant, nutty coffee-style cake.
Nazook:
Ingredients Pastry dough •
3 cups (720 ml) (420 gm/15 oz) all-purpose (plain) flour, sifted •
2½ teaspoons (12½ ml) (7 gm) (¼ oz) (1 packet) active dry yeast
•1 cup (240 ml) (225 gm/8 oz) sour cream
•1 cup (2 sticks) (240 ml) (225 gm/8 oz) softened butter (room temperature)
Filling
•1 1/2 cups (360 ml) (210 gm) (7½ oz) all-purpose (plain) flour, sifted
•1 1/2 cups (360 ml) (340 gm/12 oz) sugar
•3/4 cup (1½ sticks) (180 ml) (170 gm/6 oz) softened butter (room temperature)
•2 teaspoons (10 ml) vanilla extract
Wash
•1-2 egg yolks (for the wash; alternatively, some yogurt, egg whites, or a whole egg)
Directions: Make the Pastry Dough
1. Place the sifted flour into a large bowl.
2. Add the dry yeast, and mix it in.
3. Add the sour cream, and the softened butter.
4. Use your hands, or a standing mixer with a paddle attachment, to work it into a dough.
5. If using a standing mixer, switch to a dough hook. If making manually, continue to knead for about 10 minutes, or until the dough no longer sticks to the bowl or your hands. If it remains very sticky, add some flour, a little at a time.
6. Cover the dough and refrigerate for 3-5 hours, or overnight if you like.
 Make the filling
7. Mix the flour, sugar, and the softened butter in a medium bowl.
8. Add the vanilla extract.
9. Mix the filling until it looks like clumpy, damp sand. It should not take long. Set aside. Make the nazook
10. Preheat the oven to moderate 350°F/175°C/gas mark 4.
11. Cut the refrigerated dough into quarters.
12. Form one of the quarters into a ball. Dust your working surface with a little flour.
13. Roll out the dough into a large rectangle or oval. The dough should be thin, but not transparent 14. Spread 1/4 of the filling mixture across the rolled-out dough in an even layer. Try to spread the filling as close as possible to the edges on the short sides, but keep some of pastry dough uncovered (1 inch/2.5 cm) along the long edges.
15. From one of the long sides, start slowly rolling the dough across. Be careful to make sure the filling stays evenly distributed. Roll all the way across until you have a long, thin loaf.
16. Pat down the loaf with your palm and fingers so that it flattens out a bit (just a bit).
17. Apply your egg yolk wash with a pastry brush
18. Use your crinkle cutter (or knife) to cut the loaf into 10 equally-sized pieces. Put onto an ungreased cookie sheet. 19. Place in a preheated moderate oven for about 30 minutes, until the tops are a rich, golden brown


Armenian Nut Cake
Ingredients
•1 cup (240 ml) milk (I use whole, but nonfat or lowfat should be fine; non-dairy might work just fine, as well)
•1 teaspoon (5 ml) (5 gm) baking soda
•2 cups (480 ml) (280 gm/10 oz) all-purpose (plain) flour (I suspect pastry flour or another low-gluten flour might even work better to achieve a light, fluffy crumb)
• 2 teaspoons (10 ml) (10 gm) (⅓ oz) baking powder (I used single-acting, because it's aluminum-free, and it turned out fantastic)
•2 cups (480 ml) (400 gm/14 oz) brown sugar, firmly packed
•3/4 cup (1½ sticks) (180 ml) (170 gm/6 oz) butter, preferably unsalted, cubed
•1/2 cup (120 ml) (55 gm/2 oz) walnut pieces, may need a little more
•1 to 1-1/2 teaspoons (5 to 7 ½ ml) (5 to 8 gm) ground nutmeg (try to grate it fresh yourself; the aroma is enchanting)
•1 egg
Directions: Directions - the Traditional Way
1. Preheat your oven to moderate 350°F/175°C/gas mark 4.
2. Mix the baking soda (not baking powder; that's for the next step) into the milk. Set it aside.
3. Sift together the flour and the baking powder into a large bowl. One sift is fine
4. Add the brown sugar. Go ahead and mix the flour and brown sugar together. Or not.
 5. Toss in the cubed butter.
6. Mash the butter with a fork into the dry ingredients (you can also use your fingers if you want). You'll want to achieve a more-or-less uniform, tan-colored crumbly mixture.
7. Take HALF of this resulting crumbly mixture into your springform (9”/23cm) pan. Press a crust out of it using your fingers and knuckles. It will be easy. 8. Crack an egg into a mixer or bowl.
9. Toss the nutmeg in with the egg.
10. Start mixing slowly with a whisk attachment and then increase to medium speed, or mix with a hand whisk if you're doing it manually. Once it's mixed well and frothy (about 1 minute using a standing mixer, or about 2-3 minutes of vigorous beating with a whisk), pour in the milk and baking soda mixture. Continue to mix until uniform.
11. Pour in the rest of the crumbly mixture. Mix that well, with either a paddle attachment, or a spatula. Or continue to use the whisk; it won't make much of a difference, since the resulting batter is very liquidy.
12. Pour the batter over the base in the springform pan
13. Gently sprinkle the walnut pieces over the batter.
14. Bake in a preheated moderate oven for about 30-40 minutes. You'll know it's done when the top is a golden brown, and an inserted toothpick comes out clean.
15. Allow to cool in the pan, and then release. Enjoy!


Nazook is a layered yeasted dough pastry with a sweet filling, and nutmeg cake is a fragrant, nutty coffee-style cake.
Nazook:
Ingredients Pastry dough •
3 cups (720 ml) (420 gm/15 oz) all-purpose (plain) flour, sifted •
2½ teaspoons (12½ ml) (7 gm) (¼ oz) (1 packet) active dry yeast
•1 cup (240 ml) (225 gm/8 oz) sour cream
•1 cup (2 sticks) (240 ml) (225 gm/8 oz) softened butter (room temperature)
Filling
•1 1/2 cups (360 ml) (210 gm) (7½ oz) all-purpose (plain) flour, sifted
•1 1/2 cups (360 ml) (340 gm/12 oz) sugar
•3/4 cup (1½ sticks) (180 ml) (170 gm/6 oz) softened butter (room temperature)
•2 teaspoons (10 ml) vanilla extract
Wash
•1-2 egg yolks (for the wash; alternatively, some yogurt, egg whites, or a whole egg)
Directions: Make the Pastry Dough
1. Place the sifted flour into a large bowl.
2. Add the dry yeast, and mix it in.
3. Add the sour cream, and the softened butter.
4. Use your hands, or a standing mixer with a paddle attachment, to work it into a dough.
5. If using a standing mixer, switch to a dough hook. If making manually, continue to knead for about 10 minutes, or until the dough no longer sticks to the bowl or your hands. If it remains very sticky, add some flour, a little at a time.
6. Cover the dough and refrigerate for 3-5 hours, or overnight if you like.

7. Mix the flour, sugar, and the softened butter in a medium bowl.
8. Add the vanilla extract.
9. Mix the filling until it looks like clumpy, damp sand. It should not take long. Set aside. Make the nazook
10. Preheat the oven to moderate 350°F/175°C/gas mark 4.
11. Cut the refrigerated dough into quarters.
12. Form one of the quarters into a ball. Dust your working surface with a little flour.
13. Roll out the dough into a large rectangle or oval. The dough should be thin, but not transparent 14. Spread 1/4 of the filling mixture across the rolled-out dough in an even layer. Try to spread the filling as close as possible to the edges on the short sides, but keep some of pastry dough uncovered (1 inch/2.5 cm) along the long edges.
15. From one of the long sides, start slowly rolling the dough across. Be careful to make sure the filling stays evenly distributed. Roll all the way across until you have a long, thin loaf.
16. Pat down the loaf with your palm and fingers so that it flattens out a bit (just a bit).
17. Apply your egg yolk wash with a pastry brush
18. Use your crinkle cutter (or knife) to cut the loaf into 10 equally-sized pieces. Put onto an ungreased cookie sheet. 19. Place in a preheated moderate oven for about 30 minutes, until the tops are a rich, golden brown


Armenian Nut Cake
Ingredients
•1 cup (240 ml) milk (I use whole, but nonfat or lowfat should be fine; non-dairy might work just fine, as well)
•1 teaspoon (5 ml) (5 gm) baking soda
•2 cups (480 ml) (280 gm/10 oz) all-purpose (plain) flour (I suspect pastry flour or another low-gluten flour might even work better to achieve a light, fluffy crumb)
• 2 teaspoons (10 ml) (10 gm) (⅓ oz) baking powder (I used single-acting, because it's aluminum-free, and it turned out fantastic)
•2 cups (480 ml) (400 gm/14 oz) brown sugar, firmly packed
•3/4 cup (1½ sticks) (180 ml) (170 gm/6 oz) butter, preferably unsalted, cubed
•1/2 cup (120 ml) (55 gm/2 oz) walnut pieces, may need a little more
•1 to 1-1/2 teaspoons (5 to 7 ½ ml) (5 to 8 gm) ground nutmeg (try to grate it fresh yourself; the aroma is enchanting)
•1 egg
Directions: Directions - the Traditional Way
1. Preheat your oven to moderate 350°F/175°C/gas mark 4.
2. Mix the baking soda (not baking powder; that's for the next step) into the milk. Set it aside.
3. Sift together the flour and the baking powder into a large bowl. One sift is fine
4. Add the brown sugar. Go ahead and mix the flour and brown sugar together. Or not.

6. Mash the butter with a fork into the dry ingredients (you can also use your fingers if you want). You'll want to achieve a more-or-less uniform, tan-colored crumbly mixture.
7. Take HALF of this resulting crumbly mixture into your springform (9”/23cm) pan. Press a crust out of it using your fingers and knuckles. It will be easy. 8. Crack an egg into a mixer or bowl.
9. Toss the nutmeg in with the egg.
10. Start mixing slowly with a whisk attachment and then increase to medium speed, or mix with a hand whisk if you're doing it manually. Once it's mixed well and frothy (about 1 minute using a standing mixer, or about 2-3 minutes of vigorous beating with a whisk), pour in the milk and baking soda mixture. Continue to mix until uniform.
11. Pour in the rest of the crumbly mixture. Mix that well, with either a paddle attachment, or a spatula. Or continue to use the whisk; it won't make much of a difference, since the resulting batter is very liquidy.
12. Pour the batter over the base in the springform pan
13. Gently sprinkle the walnut pieces over the batter.
14. Bake in a preheated moderate oven for about 30-40 minutes. You'll know it's done when the top is a golden brown, and an inserted toothpick comes out clean.
15. Allow to cool in the pan, and then release. Enjoy!


Tuesday, March 27, 2012
Daring Bakers' March Challenge: Tiger Bread
Sara and Erica of Baking JDs were our March 2012 Daring Baker hostesses! Sara & Erica challenged us to make Dutch Crunch bread, a delicious sandwich bread with a unique, crunchy topping. Sara and Erica also challenged us to create a one of a kind sandwich with our bread!
Dutch Crunch Topping
Servings: This recipe should make sufficient topping for two 9x5 loaves (23cmx13cm) or 12 rolls. If you make only 6 rolls in the first soft white roll recipe, you can cut the topping recipe in half.
We’ve provided this recipe first because it is the mandatory aspect of the challenge. Note, however, that you should not prepare the topping until the bread you’ve selected to bake is almost finished rising (~15 minutes from baking).
Ingredients
2 tablespoons (2 packets) (30 ml) (15 gm/½ oz) active dry yeast
1 cup (240 ml) warm water (105-115º F) (41-46°C)
2 tablespoons (30 ml) (30 gm/1 oz) sugar
2 tablespoons (30 ml) vegetable oil
½ teaspoon (2½ ml) (3 gm) salt
1½ cups (360 ml) (240 gm/8½ oz) rice flour (white or brown; NOT sweet or glutinous rice flour) (increase by 1 cup or more for home-made rice flour)
Directions:
1. Combine all ingredients in a large bowl and beat with a whisk; beat hard to combine. The consistency should be like stiff royal icing – spreadable, but not too runny. If you pull some up with your whisk, as shown below, it should drip off slowly. Add more water or rice flour as necessary. Let stand 15 minutes.
. Coat the top of each loaf or roll with a thick layer of topping. We tried coating it with a brush but it worked better just to use fingers or a spoon and kind of spread it around. You should err on the side of applying too much topping – a thin layer will not crack properly.
3. Let stand, uncovered, for any additional time your recipe recommends. With the Soft White Roll, you can place the rolls directly into the oven after applying the topping. With the Brown Rice Bread, the loaves should stand for 20 minutes with the topping before baking.
4. When baking, place pans on a rack in the center of the oven and bake your bread as you ordinarily would. The Dutch Cruch topping should crack and turn a nice golden-brown color.
Soft White Roll
Servings: Six sandwich rolls
This recipe approximates the quintessential white sandwich roll found throughout the Bay Area. The recipe is simple, quick, and addictive.
Ingredients
1 tablespoon (1 packet) (15 ml) (7 gm/ ¼ oz) active dry yeast
¼ cup (60 ml) warm water (105-110º F) (41-43°C) (No need to use a thermometer – it should feel between lukewarm and hot to the touch).
1 cup (240 ml) warm milk (105-110º F) (41-43°C) (We’ve tried both nonfat and 2%, with no noticeable difference)
1½ tablespoons (22½ ml) (20 gm/ ⅔ oz) sugar
2 tablespoons (30 ml) vegetable oil (plus additional olive or vegetable oil for greasing bowl during rising)
1½ teaspoons (7½ ml) (9 gm/⅓ oz) salt
Up to 4 cups (960 ml) (600 gm/21oz) all purpose flour
Directions:
1. In the bowl of an electric mixer or large mixing bowl, combine yeast, water, milk and sugar. Stir to dissolve and let sit for about 5 minutes (The mixture should start to bubble or foam a bit and smell yeasty).
2. Add in vegetable oil, salt and 2 cups of flour. Using the dough hook attachment or a wooden spoon, mix at medium speed until the dough comes together. (The photo to below is with the first 2 cups of flour added).
3. Add remaining flour a quarter cup at time until the dough pulls away from the sides of the bowl, as shown in the photo below (For us, this usually required an additional 1½ to 2 cups of flour).
4. Turn out onto a lightly floured surface and knead for about 4 minutes, until smooth and elastic.

5. Place in a lightly greased bowl and cover with plastic wrap. Let rise for 1 hour, or until doubled (or more) in size (see photo comparison).
6. Once the dough has risen, turn it out onto a lightly floured surface and divide it into 6 equal portions (if you’d like to make rolls) or 2 equal portions (if you’d like to make a loaf) (using a sharp knife or a dough scraper works well). Shape each into a ball or loaf and place on a parchment-lined baking sheet (try not to handle the dough too much at this point).
7. Cover with plastic wrap and let rise for 15 minutes while you prepare the topping.

8. Coat the top of each roll or loaf with the topping as described above. While the original recipe recommends letting them stand for 20 minutes after applying the topping, I got better results by putting them directly into the oven.
9. Once you’ve applied the topping, bake in a preheated moderately hot 380ºF/190°C/gas mark 5 for 25-30 minutes, until well browned. Let cool completely on a wire rack before eating.


Wednesday, March 21, 2012
Spice Thumprint Cookies
Ingredients
1 1/2 cups all-purpose flour
1 teaspoon baking powder
1/2 teaspoon ground nutmeg
1/4 teaspoon ground cloves
1 1/2 teaspoons vanilla extract
1/4 teaspoon salt
3/4 cup butter
1/2 cup white sugar
 Beat the butter with an electric mixer until smooth. Add the sugar and beat until combined.
Combine the flour, spices, and salt. Gradually add the flour mixture to the butter mixture and stir until combined. Preheat an oven to 350 degrees F (175 degrees C).
Bake in the preheated oven until lightly browned, about 12 minutes. Allow the cookies to cool slightly on the baking sheets, and then transfer them to a wire rack to cool completely. Make sure you press an indentation in the center as soon as they come out of the oven so that you can put a bit of your favorite jam in the middle.

1 1/2 cups all-purpose flour
1 teaspoon baking powder
1/2 teaspoon ground nutmeg
1/4 teaspoon ground cloves
1 1/2 teaspoons vanilla extract
1/4 teaspoon salt
3/4 cup butter
1/2 cup white sugar

Combine the flour, spices, and salt. Gradually add the flour mixture to the butter mixture and stir until combined. Preheat an oven to 350 degrees F (175 degrees C).
Bake in the preheated oven until lightly browned, about 12 minutes. Allow the cookies to cool slightly on the baking sheets, and then transfer them to a wire rack to cool completely. Make sure you press an indentation in the center as soon as they come out of the oven so that you can put a bit of your favorite jam in the middle.

Friday, March 9, 2012
Towering Flourless Chocolate Cake
From Food Network Magazine
For the cake:
2 1/2 sticks unsalted butter, cut into pieces, plus more for the pan
6 ounces bittersweet chocolate, chopped
6 ounces unsweetened chocolate, chopped
6 large eggs
3/4 cup turbinado sugar
Pinch of salt
1/2 cup stout beer (such as Guinness)
1 teaspoon vanilla extract
For the meringue:
2 ounces semisweet chocolate, chopped
2 tablespoons unsalted butter
1 tablespoon light corn syrup
1 cup granulated sugar
3 large egg whites
1/4 teaspoon cream of tartar
Pinch of salt
2 teaspoons vanilla extract
Directions
Make the cake: Preheat the oven to 325 degrees F. Butter the bottom and sides of a 9-inch springform pan and line the bottom with parchment paper.
Put the bittersweet and unsweetened chocolate in a heatproof bowl and set over a saucepan of simmering water (do not let the bowl touch the water). Stir until the chocolate melts, then remove the bowl from the pan.

Put the eggs, turbinado sugar and salt in the bowl of a stand mixer. Set the bowl over the same pan of simmering water and whisk until the mixture is warm, about 2 minutes. Transfer the bowl to the stand mixer; beat with the whisk attachment on medium speed until tripled in volume, about 5 minutes.
Meanwhile, bring the beer and vanilla to a low boil in a saucepan.

Reduce the mixer speed to low; beat in the beer mixture, then the melted chocolate, until combined, about 2 minutes. Gradually beat in the butter until incorporated.
Pour the batter into the prepared pan. Bake until a toothpick comes out with a few crumbs, about 35 minutes. Cool in the pan on a rack 1 hour, then run a knife around the edge of the pan and remove the ring. Let cool completely.

Make the meringue: Microwave the chocolate, butter and corn syrup in a microwave-safe bowl in 30-second intervals, stirring, until the chocolate melts.
Whisk the granulated sugar, egg whites, cream of tartar, salt and 1/3 cup water in a heatproof bowl. Put the bowl over a saucepan of simmering water; beat with a handheld mixer on low speed, then gradually increase the speed to high and beat until soft peaks form, about 5 minutes. Remove the bowl from the pan; continue beating until the meringue is cool and fluffy. Fold in the vanilla, then fold in the melted chocolate until swirled.
Spread the meringue on the cake.

Monday, February 27, 2012
Daring Bakers' February Challenge: Quick Bread
The Daring Bakers’ February 2012 host was – Lis! Lisa stepped in last minute and challenged us to create a quick bread we could call our own. She supplied us with a base recipe and shared some recipes she loves from various websites and encouraged us to build upon them and create new flavor profiles.
Pear and Sour Cream Bread
1/2 c. butter
1 c. sugar
2 eggs
3 tbsp. pear juice
4 to 5 canned pear halves, chopped
2 c. flour
1 tsp. baking soda
1 tsp. baking powder
1/4 tsp. salt
1 c. sour cream
FILLING:
1/2 c. walnuts, chopped
1/2 c. brown sugar
2 tsp. cinnamon
Cream butter, sugar and eggs.

Add pear juice and chopped pear halves. Mix dry ingredients and add alternately with sour cream. Pour not quite half the batter into a greased
loaf pan. Generously heap the nut mixture into the center of
the batter.
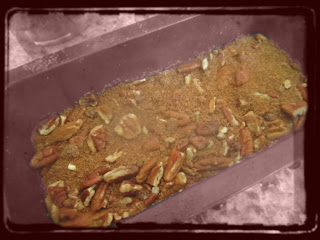
Pour remaining batter on top. Bake at 350
degrees for 50 to 60 minutes. Let cool partway in pan.


Thursday, February 23, 2012
Coconut Muffins
•2 cups all-purpose flour
•1 cup sugar
•2 teaspoons baking powder
•1 cup sour cream
•2 eggs
•1/2 cup canola oil
•1/2 teaspoon coconut extract
•1 cup flaked coconut
In a large bowl, combine the flour, sugar, baking powder and coconut.

In another bowl, combine the eggs, oil, sour cream and extract. Stir into dry ingredients just until combined. Fill greased or paper-lined muffin cups two-thirds full.
Bake at 375 for 25 minutes.


•1 cup sugar
•2 teaspoons baking powder
•1 cup sour cream
•2 eggs
•1/2 cup canola oil
•1/2 teaspoon coconut extract
•1 cup flaked coconut
In a large bowl, combine the flour, sugar, baking powder and coconut.
In another bowl, combine the eggs, oil, sour cream and extract. Stir into dry ingredients just until combined. Fill greased or paper-lined muffin cups two-thirds full.
Bake at 375 for 25 minutes.


Subscribe to:
Posts (Atom)

